Subscribe

Enter your email address:

Designer Monthly Preview

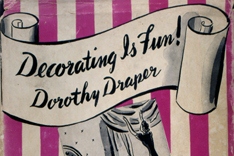
The woman who helped usher the interior design industry into full flower in the United States was prolific in putting out ideas that will help freshen up today's interior design business. Look at our latest Designer Monthly, Interior Design: Look Forward by Looking Back to Dorothy Draper.

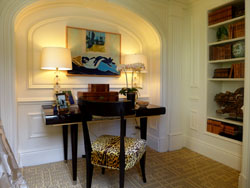
Did you ever have a problem designing small spaces?  Take a look at how top interior designers solved this common problem in our latest Designer Monthly, How to Design Small Spaces at the Kips Bay Decorator Show House.


Entries in 100 Layer Cake (47)

Thursday
Apr252013

Our Favorite Wedding Floral Headpieces

One of the most beautiful uses of fresh flowers in a wedding is the artform we know as the floral headpiece. The really good ones are masterpieces, adding to the beauty of the bride. Our students in the Complete Course in Wedding and Event Planning know that trends are important to keep abreast of, and many engaged couples are opting for more naturalistic weddings. A floral headpiece dramatically carries out this theme, adding great romance, beauty, drama, and earthiness. Here are some of our favorite floral headpieces. Click on each picture for more information, along with photography and floral styling credits.

Click to read more ...

Thursday
Apr182013

Event Planning: You're Going to Love This Peachy Kids Birthday Party!

Love the simplicity of this peachy 4th birthday party from Michelle Sterling for her daughter, Avery. Click here to see Avery’s 2nd birthday party. And this is perfect timing as a number of you asked for more “realistic” DIY birthday party ideas, in addition to those planned by moms who are event designers. We couldn’t agree more! This one is adorable and do-able. The best kind.

The inspiration for the entire party started with that fuzzy orange cat, affectionately known as “cat ball” around the Sterling house. These guys have been a favorite of Avery’s since her first steps. One actually makes an appearance in her 2nd birthday photos!

How cute is this idea for a party activity? Cheerios and lifesavers on pretty ribbon, inspired by an idea in this book. Easy enough for small hands of all ages.

Click to read more ...

Monday
Apr152013

DIY Wedding and Event Project: Menu Tags


Mimi of Mika 78 created this fun do-it-yourself project that you can use for practically any occasion from weddings and bridal showers to engagement dinners and backyard barbecues.

Materials ($20 total)

Fabric
Simple cotton canvas fabric  
Fabric Spray Glue or Xyron Machine  
Scissors  
Ribbon  
Hole Puncher  
Optional: Eyelets & Eyelet Puncher  
Iron-on Transfer Sheets for LIGHT fabric  
Dinner Napkins  
Iron  

Home printer

Let’s Get Started

Prep: Create your menu design (there’s an Illustrator and Word template, as well as a JPG of the design I’m using, at the end of this post). Set up your printer to print as a “Mirror Image” (very important, otherwise, it will iron on backwards). Then print your design onto the iron-on transfer using your home printer.

Step 1: Cut both pattern and canvas fabric to a little larger than your desired tag size making sure there’s enough room to trim.

Step 2: Adhere the 2 pieces of fabric together with fabric spray glue. I like to use a Xyron machine (with Permanent Adhesive). Either way works!

Step 3: Iron the fabric to get wrinkles and any extra moisture out.

Step 4: While your fabric is cooling off, trim around the menu design that on the iron-on transfer.

Step 5: Then place the trimmed design (graphic side down) on the desired side of your fabric. Be sure to leave enough room around the sides and top to trim the shape of your tag later on.

Step 6: Iron the graphic for 45-55 seconds with strong pressure.

Step 7: Carefully and slowly peel off the graphic starting from one corner. Make sure to do this while it’s still hot – if it cools down, you might end up with bubbles.

Step 8: Using scissors, trim around the border. Be sure to leave extra height at the top of the Menu for the ribbon and tag shape. I like to do this by hand because I like the rustic feel, but if you want something more exact, you can make a template and trace the shape onto the fabric.

Click to read more ...

Wednesday
Mar272013

DIY Wedding Project: Storybook Paper Roses

You’re going to love today’s DIY project so much that you’re going to want to start tearing pages out from old books tonight! Look at the storybook roses in Shanna + Richard’s wedding. Sweet, right? Floral designer, Cathy Brim of Bloom Floral Design created the elegant branch bouquets seen in their ceremony using Valerie Lloyd’s paper roses design, and now we’re jumping-out-of-the-pages excited that Valerie is sharing her DIY secrets with you!


What You'll Need: Paper of any kind, Grosgrain Ribbon, ½ Width cut to 4 inch lengths   16 Gauge Wire cut to 15 inch lengths, Glue Gun, Glue Sticks (low temp), Scissors, Wire Cutters  
 

Step 1: Gather materials. If you are using vintage books or sheet music as your paper source, make sure the pages are still flexible enough to curl with your fingers. The wire can be found at the hardware store, and is sometimes called “black wire” or “annealed coil wire.” Be sure you are using low temp hot glue because you’ll be able to feel it right through the paper petals as you work.

Step 2: Cutting. You will need to stockpile at least 5 different sizes of petals ranging from about ¾ inch wide to 3 inches wide. I cut freehand, and avoid templates, so that each petal is a unique and organic shape. Think of the shapes as little church windows or arches. Some can be pointy, and some can be rounded. For each flower you will need at least 4 of each size. Make more than you need.

Step 3: Shaping. I really feel that this is the most important step to create natural and soft looking flowers. Roll the edges of each petal, and pinch the base slightly. Each one can be done a little differently to give the petals character and roundness. I shape all of my petals before I even begin gluing anything.

Click to read more ...

Thursday
Feb282013

Wedding Video: Lakeside Camp Wedding in Maine

If you're thinking of great wedding inspiration for the coming spring season, look no further than 100 Layer Cake - one of our favorite wedding blogs. They cover a variety of weddings and feature top wedding vendors, from the best photographers to the best florists. We thought you'd like to see a video of one of the loveliest, most spiritual weddings we've witnessed in a long time. Click here for photographs and details of the entire wedding, and enjoy this inspirational video - you'll see the entire day-before activities, the extensive decorating of the wedding and reception venue, and great candids of the entire event.
 

Photography: Angelica Glass / Videographer: Wade of Shark Pig / Event Coordinator: AAB Creates / Hair & Makeup: Jessie Riley / Florist: Fernanda / Sweets: Two Fat Cats BakeryEast End Cupcakes,Shain’s of MaineBlue Marble Ice Cream of Bklyn / Catering: The Black Tie CompanyLake Region CateringBite Into Maine / Invitation designer: Parrot Design Studios / Calligraphy: Neither Snow / Lighting: Moonlighting Production Services / DJ: Josh Sparber / Band: Shirim Klezmer Orchestra / Rentals: Leavitt & Parris / Venue: Seeds of Peace / Wine: Old Port Wine & Cigar / Artwork: Michael Arnold (father of the bride) / Bride’s dress: Ayesha Depala / Shoes: Manolo Blahnik / Veil: made by a friend of the bride / Groom’s suit: Knot Standard, shirt by Proper Cloth / Shoes: Kenneth Cole / Rings: Cameo by Rux / Flower girl dress: Pegeen / Bridesmaids: chose their own dresses


Thanks to 100 Layer Cake for their beautiful photographs, posts, and wedding inspiration. 100 Layer Cake is a unique, comprehensive wedding planning resource for and by thoughtful, crafty modern women. Their vendors, projects, weddings, resources, sponsors, and marketplace are hand-picked and thoroughly researched with the hope that every single one is a truly unique addition to both your wedding and your planning process. Visit the 100 Layer Cake website today.


If you're interested in learning more about wedding planning and decor, we encourage you to explore the Sheffield School, New York, NY. Sheffield began as an Interior Design school in 1985, and then expanded our course offerings to train people in other design-related fields, including Feng ShuiWedding and Event Planning, and Jewelry Design. With thousands of active students and more than 50,000 graduates, Sheffield has trained more design professionals than any school in the world.

  • Request a free Sheffield School catalog describing our distance education courses.
  • Subscribe to the Sheffield Designer newsletter.