Subscribe

Enter your email address:

Designer Monthly Preview

The woman who helped usher the interior design industry into full flower in the United States was prolific in putting out ideas that will help freshen up today's interior design business. Look at our latest Designer Monthly, Interior Design: Look Forward by Looking Back to Dorothy Draper.

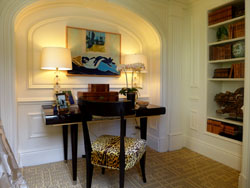
Did you ever have a problem designing small spaces?  Take a look at how top interior designers solved this common problem in our latest Designer Monthly, How to Design Small Spaces at the Kips Bay Decorator Show House.


Entries in napkins (3)

Friday
Jul052013

Wedding Inspiration: Reception Dinnerware

I think details like tabletop decor and place settings make all the difference in a well-planned wedding. When guests sit down to their table at a reception venue, they'd better go "Oooh" and "Wow" or else you're not doing your job as a wedding planner! We tell our wedding planning students to pull out all the stops with creativity on the job, and in many cases, that involves encouraging your clients to put on their DIY hats and contribute something to the special look of their own wedding. Look at the setting above, for instance. The vintage dinner plate is paired with a salad plate that boasts gold-enscribed hearts and a "Just Married" message, with gold utensils completing the coordinated look.

I've chosen a few noteworthy dinnerware choices, and all you have to do is click on each photo to see more about the real-life weddings they came from.


Click to read more ...

Monday
Apr152013

DIY Wedding and Event Project: Menu Tags


Mimi of Mika 78 created this fun do-it-yourself project that you can use for practically any occasion from weddings and bridal showers to engagement dinners and backyard barbecues.

Materials ($20 total)

Fabric
Simple cotton canvas fabric  
Fabric Spray Glue or Xyron Machine  
Scissors  
Ribbon  
Hole Puncher  
Optional: Eyelets & Eyelet Puncher  
Iron-on Transfer Sheets for LIGHT fabric  
Dinner Napkins  
Iron  

Home printer

Let’s Get Started

Prep: Create your menu design (there’s an Illustrator and Word template, as well as a JPG of the design I’m using, at the end of this post). Set up your printer to print as a “Mirror Image” (very important, otherwise, it will iron on backwards). Then print your design onto the iron-on transfer using your home printer.

Step 1: Cut both pattern and canvas fabric to a little larger than your desired tag size making sure there’s enough room to trim.

Step 2: Adhere the 2 pieces of fabric together with fabric spray glue. I like to use a Xyron machine (with Permanent Adhesive). Either way works!

Step 3: Iron the fabric to get wrinkles and any extra moisture out.

Step 4: While your fabric is cooling off, trim around the menu design that on the iron-on transfer.

Step 5: Then place the trimmed design (graphic side down) on the desired side of your fabric. Be sure to leave enough room around the sides and top to trim the shape of your tag later on.

Step 6: Iron the graphic for 45-55 seconds with strong pressure.

Step 7: Carefully and slowly peel off the graphic starting from one corner. Make sure to do this while it’s still hot – if it cools down, you might end up with bubbles.

Step 8: Using scissors, trim around the border. Be sure to leave extra height at the top of the Menu for the ribbon and tag shape. I like to do this by hand because I like the rustic feel, but if you want something more exact, you can make a template and trace the shape onto the fabric.

Click to read more ...

Tuesday
Apr242012

How to Make Do-It-Yourself Hand-Dyed Wedding Napkins

If you're thinking of great wedding inspiration for the coming spring/summer season, look no further than 100 Layer Cake - one of our favorite wedding blogs. They cover a variety of weddings and feature top wedding vendors, from the best photographers to the best florists. We thought you'd like to see this fun wedding craft. It's by Rachel, and you really need to pop over to Rachel’s blog. Here's how she describes her nifty DIY idea. 

This project is so beautiful and REALLY relevant to any one of us with a crafty heart. You could make these to use around the house, for a special holiday dinner party, for a bridal shower, a festive brunch, for gifts ... the list goes on. All the pretty photos and projects make good inspiration for life, not just weddings.

We decided to rent the plainest, cheapest white tablecloths possible for our long dining tables. And since we weren’t having lots of fresh flowers or pretty place settings, we knew we’d want to use the napkins to add some color. The side benefit was that we got to have cotton napkins, which I love – they're actually absorbent, unlike the standard polyester ones you can rent from most places.

Napkins are easy enough to sew, but all that hemming is time consuming so I decided to start with pre-made napkins. If you’re having a smaller wedding, you could definitely save some money by making your own. Just start super early.

We wanted a striped look, but as we started playing with the process we found that we really loved the striped tie-dye effect we came up with. Have several extra napkins on hand so that you can experiment. Folding the napkins in different positions will give you stripes in different places and you’ll want to test your dye intensity and rinsing and drying procedures – all of these factors impact your final product.

Click to read more ...