Subscribe

Enter your email address:

Designer Monthly Preview

The woman who helped usher the interior design industry into full flower in the United States was prolific in putting out ideas that will help freshen up today's interior design business. Look at our latest Designer Monthly, Interior Design: Look Forward by Looking Back to Dorothy Draper.

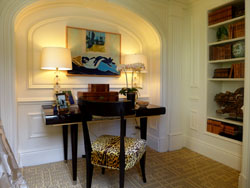
Did you ever have a problem designing small spaces?  Take a look at how top interior designers solved this common problem in our latest Designer Monthly, How to Design Small Spaces at the Kips Bay Decorator Show House.


Entries in DIY (17)

Wednesday
Mar272013

DIY Wedding Project: Storybook Paper Roses

You’re going to love today’s DIY project so much that you’re going to want to start tearing pages out from old books tonight! Look at the storybook roses in Shanna + Richard’s wedding. Sweet, right? Floral designer, Cathy Brim of Bloom Floral Design created the elegant branch bouquets seen in their ceremony using Valerie Lloyd’s paper roses design, and now we’re jumping-out-of-the-pages excited that Valerie is sharing her DIY secrets with you!


What You'll Need: Paper of any kind, Grosgrain Ribbon, ½ Width cut to 4 inch lengths   16 Gauge Wire cut to 15 inch lengths, Glue Gun, Glue Sticks (low temp), Scissors, Wire Cutters  
 

Step 1: Gather materials. If you are using vintage books or sheet music as your paper source, make sure the pages are still flexible enough to curl with your fingers. The wire can be found at the hardware store, and is sometimes called “black wire” or “annealed coil wire.” Be sure you are using low temp hot glue because you’ll be able to feel it right through the paper petals as you work.

Step 2: Cutting. You will need to stockpile at least 5 different sizes of petals ranging from about ¾ inch wide to 3 inches wide. I cut freehand, and avoid templates, so that each petal is a unique and organic shape. Think of the shapes as little church windows or arches. Some can be pointy, and some can be rounded. For each flower you will need at least 4 of each size. Make more than you need.

Step 3: Shaping. I really feel that this is the most important step to create natural and soft looking flowers. Roll the edges of each petal, and pinch the base slightly. Each one can be done a little differently to give the petals character and roundness. I shape all of my petals before I even begin gluing anything.

Click to read more ...

Tuesday
Mar052013

Make It Online: Do-It-Yourself Wedding Bouquets

If you're thinking of great wedding inspiration for the coming spring season, look no further than 100 Layer Cake - one of our favorite wedding blogs. They cover a variety of weddings and feature top wedding vendors, from the best photographers to the best florists. We thought it would cool to show you how they used an online resource to design their own DIY wedding bouquets!

Spend just a few minutes on Flower Muse and you’ll get sucked into a wonderland of pretty flowers. They make it so easy to discover new flowers you may have never even heard of. Search by name, color, or just browse their featured, in season, discounted flowers and bulk up. That’s what we did!

Jillian worked with Danielle of Brown Paper Design to create a few bouquet recipes based on some of Flower Muse’s most popular flowers. To help you out, we chose to make bouquets at different price points, from  $75-$200. So, no excuses. If you want to DIY your bridal bouquet, do it! Just pop over to Flower Muse to pick out some of your favorite flowers.

How much do you love these flowers? Ok, so here’s what we made with them:

Click to read more ...

Wednesday
Feb202013

Special Effects: Venetian Plaster

(Venetian plaster by Papillon Art Solutions)If you’re ready to graduate to the big league of décor and you want to add that special feature to your interiors, then it’s time to look at Venetian plaster, a special wall treatment technique.  Venetian plaster is one of the oldest wall treatments and has been around as far back as 9500 years.

True Venetian plaster is made of slaked lime mixed with marble dust.  Other “Venetian plasters” sold in the U.S. may be made of other materials that have no lime and may actually be made of acrylic resins.  The true beauty of Venetian plaster is that the plaster layers can be “burnished”, a technique which creates a high polished look, and gives it the sheen and depth that regular paint can’t achieve.  Burnishing requires polishing the final plaster layer with a trowel. 

Above is an example of a stairway in a golden Venetian plaster by Papillon Art Solutions. Below is an example in a rose Venetian plaster.  Notice that when viewed from different angles, light will reflect from the plaster layers. 

You can also use two or more different colors and layer it to achieve a very unique multi-colored depth, as shown above. This technique can mimic the more expensive marbles but at a fraction of the cost!

(Venetian plaster, courtesy of Titus Built)Venetian plaster can be juxtaposed with other painted surfaces for a wonderful contrast effect.  As shown above from Titus Built, the mouldings and dado are covered in white paint which provide a contrast to the sheen of the Venetian plaster above. 

If you want to learn more about Venetian plaster, follow this link for a do-it-yourself approach - you'll see how much goes into this beautiful finishing.


Interested in learning more about wall treatments? Take a look at Sheffield School's Complete Course in Interior Design. At Sheffield, you'll learn how to transform a space, create color schemes, and select furniture, lighting, and accessories.

Wednesday
Nov212012

Interior Design Trend: Tricked-Out IKEA Interiors 

Stunning tricked-out IKEA kitchen cabinets (Apartment Therapy / House Beautiful)

When Apartment Therapy and House Beautiful start to include design details that feature modified or "tricked-out" IKEA fixtures and furnishings, then you know you have a serious trend on your hands. Modifying the clean design of IKEA's furniture, cabinetry, and other home goods has become a global pasttime as do-it-yourselfers and home designers make modifications to create custom looks from basic pieces. The kitchen cabinets in the photo above, for instance, never looked like that in the showroom or catalog; they were custom detailed and finished to elevate the look. Saving money on the basics is what IKEA is all about, but elevating and tricking-out the basics to create a one-of-a-kind end result is what interior designers and DIY homeowners are all about.

The Gallant wall storage shelves were tricked out to create a new media console (IKEA Hackers) 

This trend has become so hot that there's even a popular website documenting a wide array of tricked-out projects: IKEA Hackers. Here are a few tricked-out projects that really caught our eye. Click on each photo for more information.

High gloss red tabletops become a backlit headboard (IKEA Hackers)

Regolit lamp covered with paper muffin liners (IKEA Hackers)


Click to read more ...

Friday
Oct262012

DIY Wedding Project: Make Your Own Bridal Shower Favors

100 Layer Cake - Certainly you’re all familiar with the superduper talented Mimi of Mika78. And clearly we’re all going to want to be a little MORE familiar with her after this post is over. Because if you’re more familiar, as in like friends with her, she puts together an amazing bridal shower for you, complete with a little box of handmade goodies for your guests. Here is how you can make your own bridal shower favors for about $50. Here are the materials you'll need for this DIY project:

Vintage tea cups
Your favorite Tea  
Vintage hankies  
Paper, bakers twine, cardboard box, and doilies


Mimi created this whole suite for one of her closest friends Christina’s bridal shower. Christina is, in Mimi’s words, "an unbelievable woman and friend," and Mimi wanted to create something really, really special to celebrate her bridal status. She and the rest of the bridesmaids planned an afternoon tea party at a cute restaurant in NYC's West Village, which turned out to be exceptional inspiration for the invitation.

Because Mimi is so incredibly talented, thoughtful, and design-obsessed, she scoured the city’s vintage flea markets for weeks looking for the perfect tea cups and napkins to incorporate into her design. Sigh. Does it get much more heartfelt? (Not to mention absurdly cute.)

She worked with our now friend and DIY contest winner of Bryn of Paperfinger (we didn’t know her when she won the contest, we swear), for the pretty calligraphy. Bryn wrote a bunch of different messages, including a quote Christina is using in her invitations, on the vintage tea cups using a gold pen. And Mimi also included tea bags with little handmade tea tags in each guest gift.

And Mimi made little fill-in-the-blank notes for guests to give to Chris at the shower. Everyone read theirs aloud at the shower and it turned out to be an excellent way to not only get to know Chris’s friends and family a little better, but also to allowed each woman to reflect on her own friendship with the bride-to-be. At the end, Mimi collected each note and put them into a scrapbook for Chris. Such a cute idea!

Click to read more ...